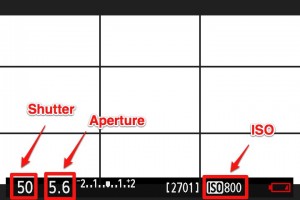
 In this article I’ll walk you through a very basic setup to get the very best video. It doesn’t take a lot to get fantastic quality video from your DSLR! By the way. I use DSLR and HDSLR interchangeably. Some folks refer to digital SLR cameras that shoot video as HDSLR cameras. I like that because it distinguishes between regular DSLRs and those that can record HD Video. Ok, on to the setup.There are a few basic concepts that I want to discuss so you know why we are doing, what we are doing, with our basic setup. If you understand the underlying rules, you will know when and how to break the rules to your advantage. I’m using a Canon T2i but the concepts will carry across any HDSLR camera.
Set your Camera to film mode and let’s get started…
SIZE & FRAME RATE
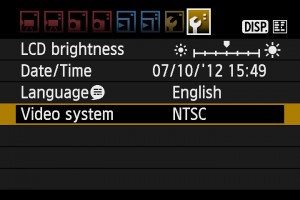 Set your video standard to NTSC or PAL.
You want the best possible image so we will start by setting your picture image to the largest size. That will be either 1920 x 1080 or 1280 x 720. Some cameras like the Canon T2i will couple the size and frame rate. Since I am working in NTSC, my choices are 1920 x 1080 at 30 or 24 frames per second (fps) or 1280 x 720 at 60 fps. For a true cinema feel, you will want to choose 1920 x 1080 @ 24fps. This option is also available in PAL standard. Good news!
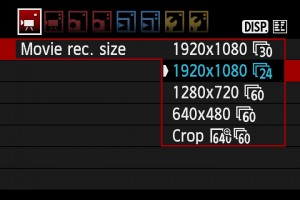 Why 24 frames? The advantages of 24 fps over other frame rates is purely aesthetic. Since the mid 1920’s films have been played back at a rate of 24 frames per second. Frame Rate on Wikipedia for the history of 24 fps.
By setting our cameras to 24 fps we get a much more cinematic or “film look” to our productions. Most modern editing systems can handle 1920 x 1080 @24p with ease.
AUTO MODE
So we could simply throw our camera in AUTO Movie Exposure mode and start shooting. I am amazed at how well this works in MOST situations. The sophistication of the color balance and auto exposure yield ‘acceptable’ video results 80% of the time. Try it. Shoot a lot this way. Learn the advantages and limits of shooting this way. I still occasionally shoot in Auto Mode.
While you can easily shoot great movies in Auto mode, there is one subtle little trick that will take your productions to the next level. By putting your camera in Manual Mode you now have control over the Shutter speed. Cinematic films are shot at 24 fps as I’ve already indicated. This is half of the movie magic equation…
To get a true movie look you MUST shoot using a 180 degree shutter speed. Or, twice the frame rate. Twice 24 would be 1/48 and our closest choice is 1/50 (which is 200 degrees - close enough).
A faster shutter will produce results more like video. A slower shutter will produce mushy (for lack of a better word) film.
Without getting all technical let’s just say that around 180 degrees (1/48) will give your films a truly cinematic feel. Shutter Speed on Wikipedia for technical details.
SOUND RECORDING
Set this to on as we will use it. Either as is or as a sync track for later.
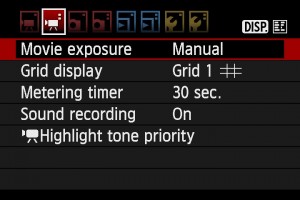
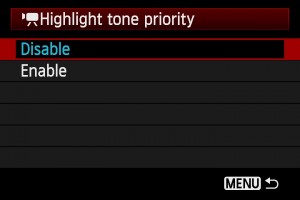
This limits the highlights and keeps them from blowing out. Turn this off. We will manage the highlight exposure ourselves.
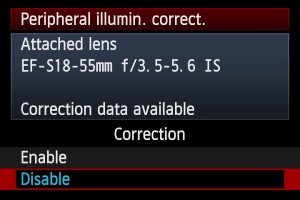 PERIPHERAL ILLUMINATION CORRECTION
This makes exposure corrections based on your lens. Turn this off.
AUTO LIGHTING OPTIMIZER
Turn this off. Don’t ask questions 😉
PICTURE STYLE
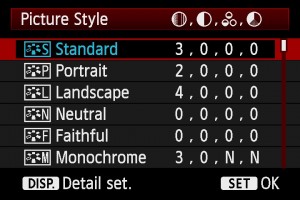 This can be set to your taste and workflow. If you will do minimal color grading in post, set to Standard. If you want some latitude to do color grading in post, set to Neutral.
READY AIM EXPOSE
OK, now that we have our camera set up for BASIC shooting (That was painless) let’s go shoot something.
SHUTTER
First, let’s set our shutter to 50. As explained above this is the secret to a cinematic look and feel.
Next we’ll set our aperture. The lower the number the shallower the depth of field - or the area that is in focus. Setting your ƒ stop to be wide open is what helps you get that beautiful bokeh, or blurry background. A lens works like your eyes. The sharpest area in in the center of the lens. Stopping down (selecting a high ƒ stop) forces the lens to operate in it’s sweet spot focus wise. Consequently, everything (or nearly everything) is in focus. When you open up and select a low ƒ stop, the range of focus or focal point is much narrower.
Exposure is a combination of Aperture, shutter and ISO. Since we want a cinematic look, we need to leave our shutter at 50 and use Aperture and ISO for proper exposure.
ISO
We want to get a proper exposure while getting the right amount of exposure and depth of field. ISO is your camera’s sensitivity to light. In the old days, it was a rating given to film to describe it’s sensitivity. Now it’s electronic and you can think of it as GAIN of the electronics. More gain, however, is not ideal. The higher the ISO the more grain you will introduce to your image. Lower is better. So, work with your aperture and ISO to get a well exposed image on your LCD.
EXPERIMENT
So go out and play. You have the basic settings and some reasons why these will work best. Nothing is set in stone so play and experiment. The BEST way to get great movies consistently is to know your camera well. I hope I have given you a good starting point. Next articles will include in depth studies of DOF, Lenses, Magic Lantern, and advanced setups.
Leave me a comment! I’d love to hear from you.
{ 13 comments… read them below or add one }